# Viewer Pane
The viewer pane is where the document content will be displayed.
# Viewing Document
The viewer can be divided into three main areas as the following image:
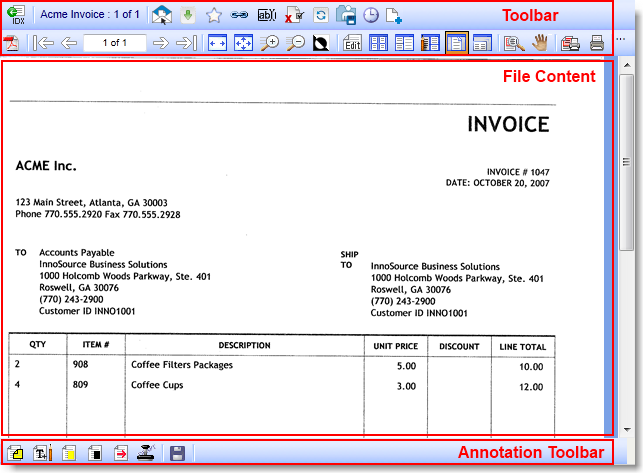
# Toolbar (First Level)
The first level toolbar contains functions related directly to Docufree.
| Task | Description |
|---|---|
 Info Toggle Info Toggle
| Toggles the visibility of the Meta Pane. |
| Document Selectors | If you have opened a group of documents (or if current document has other bound items), they will be available in this area. Use the arrows to view the previous/next document or select one from the dropdown. |
 Share Share
|
Use the three share options to share a file with others.
|
 Download Download
| You can download a file in its native format. |
 Favorites Toggle Favorites Toggle
| You can save files and web links as a Docufree favorite for quick and easy access from Site Tools->Docufree Favorites. Clicking it on a file marked as a favorite will remove the favorite status. |
 Link Files Link Files
| Use this button to Link to another open file. This is the way to link files in different locations. |
 Rename File Rename File
| If you have access, you can rename a file. |
 Delete File Delete File
| If you have access, you can delete a file. Deleted files are automatically moved to the trash bin. |
 Refresh Refresh
| Use this button to manually refresh the document view. |
 Edit Edit
| You can view a Microsoft Word, Microsoft Excel, Microsoft PowerPoint, or Html file and modify the file directly using this button. For editing image type files, see Editing Images. |
 Save to My Tabs Save to My Tabs
| Save this file to the Home tab as a My Tab, making it quickly available when you login. |
 Request Service Request Service
| Based on the type of file, you may be able to request OCR or Render service for the current file on-demand. |
 Add File Add File
| You can add a file to the location of the current file using this button. The methods to add a file are Capture Center, Html, Word, Excel, and Powerpoint. Files added through the viewer will be bound to the current file by default. |
# Toolbar (Second Level)
The second level toolbar contains functions related to viewing current document. The actions here do not modify the file, only changes the current currently viewing page or other view options.
Image type files and rendered files will support being transformed into a pdf view or being printed as you see them in the viewer. This functionality requires a recent version of Adobe Reader.
# File Content
The file content area displays the actual document content. For most files this is an image or rendered representation of the document. If the file type is not supported (e.g. a zip file) or has not been rendered, a message will be displayed in-place that tells you the reason and what you can do to view the file.
If there are annotations on the file, they are also displayed here.
# Annotation Toolbar
If the document is an image file and you have the proper permission, the annotation toolbar will be displayed. This will allow you to add, modify, and save them along with the current file (the original file is not changed).
Common annotations such as stamp, sticky note, arrow, free text, highlight, redaction are supported. If you use the pdf view options in the viewer (including print), the annotation will also be part of the pdf.
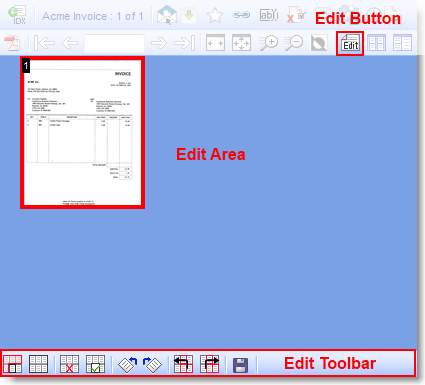
# Editing Images
For a supported image type, the viewer can be used to make quick edits on the document if you have the permission to edit the file. To enter into the edit mode, click on the Edit button in the second level toolbar.
Note
Only one person can edit the same document at a time. If another person has the image in edit mode, you will be notified that the file is locked when you click on the Edit button.
# Editing Toolbar
The editing toolbar supports splitting, deleting, rotating, and reordering pages. To edit images in the edit mode, first select the pages that you wish to make the modifications. The selected pages will be marked with a red border (see above example). To unselect a page simply click on it again.
Once you have made the correct selection, you can use any of the functions in the edit toolbar to preview your changes. When you are satisfied with the changes just click on the Save button to make the changes permanent.
Note
Splitting a document will create a new file in the current location. The newly created file will be on its own and not associated with the original image.