# Meta Info Pane
The meta info pane shows all the Docufree meta data associated with the currently open file. The data is grouped under tabs for easy access. Depending on your licensed features some tabs may not be available. Additionally, the entire meta pane may not display depending on the permission set on the location or the type of file.
# Indexes Tab
Use the index tab to access a file's indexes, document types, binds, links, collaboration, and workflow tasks.
# Index Data
Use the Index Data portion of the Indexes tab to edit or view the index values for the file
# Doctype
Use the Document Type portion of the Indexes tab to view or assign a document type to a file. Only one document type can be assigned to a file.
TIP
The document types appear based on the group or groups to which you are a member. If the group has rights to that location then the document type list for that group is populated so you can select the document type from the drop-down list.
# Binds and Links
Use the Binds and Links portion of the Indexes tab to quickly view other files bound or linked to the file you are viewing. Click the link to view the bound or linked files. You can use the red X to delete a bind or link between files.
TIP
If the link is to a folder for which you do not have access, you will be notified in the viewer and the content of the file will not display.
# Workflow Task
This portion only displays if you have a workflow task assigned to you on the open file. Use the Workflow Task portion of the Indexes tab to work any workflow tasks assigned to you.

To complete a workflow task:
- Complete the task direction.
- Optionally, select an option from the drop-down.
- Optionally, type in a note. The note will be added to the notes collection on this file.
- Click Submit. The file will continue through the workflow process. You must click Submit in order for the task to move forward through the workflow process.
TIP
Data entry tasks can be set to require a specific index and/or doctype. Required indexes are noted in red text. If this information is not complete when you click Submit you will receive an error notice on the screen. These requirements must be completed before the submission is allowed.
# Collaboration
The Collaboration portion of the Indexes tab only appears for files where a link with collaboration has been sent to you. Use the Collaboration portion of the Indexes tab to collaborate with other people about a file. All collaboration about the file will be kept in the notes collection of the file.

To collaborate on a file:
- Optionally, select a response from the drop-down.
- Type in a message.
- Click Reply.
TIP
The Response drop-down choices can be modified in Administration | File Room | Index Setup | Manage Custom Lists | SYS_Collaboration.
# Workflow Tab
Use the workflow tab to access and manage a file's workflow information. Click on
the  Refresh button to update the listing, and click
on the
Refresh button to update the listing, and click
on the  Submit button to choose a workflow to submit
the file.
Submit button to choose a workflow to submit
the file.

If a file has been submitted to a workflow then active and historical workflow information is listed.
| Column | Description |
|---|---|
| Workflow |
The name of the workflow. Click this link to view the detailed workflow history
for the file. The workflow state appears in parentheses.
|
| Status | The custom workflow status of the file within the workflow process. |
| Time Frame | The time taken for the workflow to run for the file, start to end. |
| Cancel Workflow | This is accessed by right-clicking the active workflow item. If you have the proper permission, you can cancel an item from a workflow. |
# Notes Tab
Use the notes tab to access a file's notes and keywords. All communications about a file are kept in the notes collection.
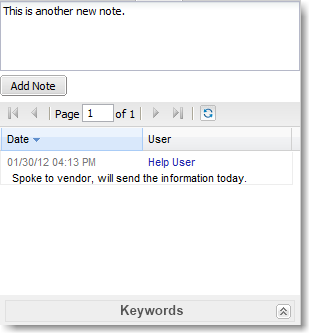
To add a new note:
- Type the note in the top field.
- Click Add Note button. The new note appears below when it has been successfully added.
The notes are displayed along with the time it was added and the user who added it.
The keywords section at the bottom are hidden by default but can be expanded to view and edit if you have the proper permission.
TIP
The keywords function is kept for backward-compatibility purposes and uses of this should be limited.
# Ocr Tab
The ocr data for the file displays in this tab. The ocr data is displayed one page at a time, so for a multi-page document you will be using the pager to view the ocr data for other pages.

If you have the permission to edit ocr, the
 button will be enabled so you can save the changes.
# Audit Tab
The audit tab displays actions that have happened to a file during its life cycle
in Docufree. You can click on any of the column headers to automatically sort and
group that column. You can also export all the audit entries to an Excel file by
clicking on the  button. The current group and sort info will be preserved in the export.
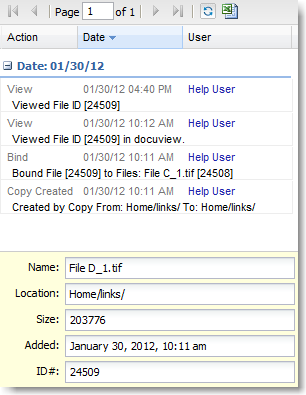
To the bottom of the audits are more file information for support and information puposes.